
I took responsibility for only half of these items as Orcrist rocked the rest. As such we are going to share this blog post. I will start telling you my part and he will finish with all the amazing bits he put together to bring our costumes to completion. We'll dive right in after the jump.
Once it became obvious that there was no way to get white boots for a child, we sought out a cheap pair of boots to paint, which I was assured would be completely doable. I found a cheap pair of Ugg style boots at Walmart in black. I wish I could have found brown or anything lighter, but I had no luck. These boots became the bane of this project. I should have washed and bleached the boots first, but I didn't. I didn't think about the fact that I'd bought cheap boots and that meant that there was excessive amounts of dye on it. I also coupled it with a cheap can of white spray paint, since I went for quantity over quality, something I really should know better than doing. As always, the quality issue of both products made the color change all but impossible for this setup.
On the first go, the cheap white paint did not disperse well. So, I had to spray a lot heavier than you typically would with spray paint. That highlighted the second problem of the black dye on the boots absorbing the white paint. In places where the paint was exceptionally heavy the paint turned grey and began to run. Instead of white boots, or even black boots, I had grey sticky runny mess. I ended up soaking them in hot bleach water to try to get the rest of the dye to either set or release entirely. After having the boots dry for a couple days I got some good white spray paint and tried again. Unfortunately, it took an entire can to get about half of a boot done. It was quickly apparent that this was going to be a very expensive approach. I had half joked earlier that I would just use the Sherwin Williams outdoor white house paint with primer. Well after that can of spray paint only did half the job (of the already greyed boot), and I still had another entire boot to do, I grabbed the can of paint and using a sponge brush lathered the boots (which I stuffed with paper to help hold their shape) with the white latex. Not only did it succeed in turning the boots white, it survived most of the weekend of GeekGirlCon. Yay, Death Star Leia white boots, check!
 |
| Close up photo of Leia's actual belt from here |
 |
| After several of the "eyes" fell off. |
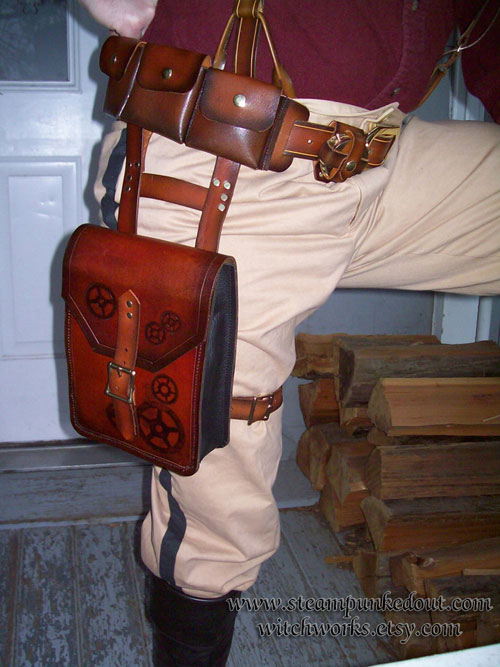 | |
| Found HERE Mine doesn't have the gears |
 |
| The green stuff is the modeling putty that is filling in the recessed swish. |
 |
| My finished jedi gauntlets |
And now Orcrists talents:
There were several black leather accessories that were needed for the Jedi and Endor Leia costumes. We needed at least four belt pouches and two blaster holsters. Originally, I had planned to just buy a yard of black pleather from the fabric store and cut and hand stitch it into the right shapes. Instead we went with a slightly more creative approach. I found a nice condition pleather laptop bag at the thrift store which had enough large pieces and pockets to make a nice number of accessories.
Re-purposing a laptop bag turned out to be a good idea and saved a bit of time and money. It cost me about $3 (much cheaper then the fabric store pleather) and had a number of small accessories in the form of snap buckles, snaps, velcro, and the like that I could re-use on the pouches. Next time I might use the actual leather bag I have in the office, that is too small to hold a modern laptop, to make some nice leather pouches. The bag I used was stitched with double rows of strong black thread. I used a seam ripper to separate all of the large pieces before I got started on making anything. This turned out to be a boon as I was able to simply stitch through the existing machine punched holes pretty easily. It also left a nice looking pattern on the areas where I didn't stitch or didn't stitch beautifully even lines as it still looks like it has a rows of perfectly spaced holes. If I needed a smooth edge, I could use those double rows to do a simple roll hem on the pleather as well.
I used up an old heavy gauge black thread that has been floating around since my wife was a little girl since it can't be used with a sewing machine. To stitch I just used a standard sewing needle. Ver1 thought it was really cool that I was hand stitching just like she had learned to do on one of her 4H Clover Buds projects. She though it was amazing that Daddy could do it too.
For Endor Leia I found a black leather child's belt at a thrift store. Leia doesn't have a large flashy buckle in this costume so we just buckled it in the back and the poncho covers the shiny brass buckle.
 |
| Endor Leia's Belt with holster and functional pouches |
I made two pouches. For the first one I simple cut out a pocket that was already on the laptop bag and stitched the square luggage tag to the back for a belt loop. This made a long skinny pouch with a velcro closure that she ended up using frequently to hold various small things she was given at vendor tables as she could get it open and closed easily.
For the second pouch, I wanted to make a wider, shallower one for slightly off center of the front of the costume. I folded a piece of the pleather inside out and just stitched the pre-punched seams back together, leaving some on the top for a fold over flap. Then flipped it around and had a nice pouch. For the buckle and the belt loop I re-purposed the small strap and buckle that was holding the luggage tag and wrapped it around the pouch, stitching it in place on the top and bottom of the back side and to the flap on the front.
Finally, Endor Leia needed a gun holster, but Leia in the movie had a long skinny holster and I wanted to mimic that since it would really bring the costume look together. I used a large piece of pleather and made a cone out of it and flattened the tip slightly by cutting it off and tucking it back up inside. It made a nice simple upright holster that kept the gun from falling out, but also allowed her to draw it out easily. I have read online that pleather used as a holster can stretch and mold around heavier guns (such as metal steampunk style) and make it hard to draw them. This wasn't a problem with this design and the plastic blaster at all.
For my Jedi costume, I needed a couple of pouches as well in adult size. I made one with the same method as the Leia pouch. Turn the pleather inside-out and fold it over, stitch through the existing seam and turn is back around. I then added one of the plastic snap clips that used to hold the laptop bag closed to the underside of the pocket flap and the bottom of the pocket. Then I could just snap it open and closed with one hand.
The other pocket ended up more creative. I decided I wanted a button panel that you often see on the fighter pilot belts in Star Wars. The Jedi also have small vials on their belt that I assumed I cold mimic with the pen holder and some painted dowels. I used the inside of the bag where there was a pocket and a pen holder. The pocket was canvas with a pleather backing. I just added a belt loop to the back and filled the pocket with a couple of toddler board books to give it a solid look. I ended up finding some small metallic permanent markers on sale at Staples for $1.25 and I used those to color the buttons and as the vials themselves. Not authentic, but good enough for my budget and it looked pretty good.
 |
| Jedi useable pouches with drawn button panel |
I combined this with a double belt (one standard brown and one a large flat black) that I overlapped for a basic Jedi belt look. I also stitched one on the plastic loops from the laptop bag that used to hold the carrying strap onto the black belt as a lightsabre clip.

 Finally,
we needed a holster for that large Han Solo style blaster my wife was
using on her costume. This was tricky as she wanted it at a 45 degree
angle and directly above the flap on her thigh pouch. This took a bit of
design work because of the wide shape of the gun and getting the angles
just right, but the stitching went quick. I made a wide cone shaped
holster with a thin strap and a small snap to hold the gun in place.
Then I made a belt loop at the correct angle, but added another of the
plastic snap clips to the actual belt loop so that the holster can be
removed easily without first taking off the thigh pack. This way she
could change in and out of costume, but still keep the thigh pack that
she was using for all her important stuff on her belt without
any hassle with the holster.
Finally,
we needed a holster for that large Han Solo style blaster my wife was
using on her costume. This was tricky as she wanted it at a 45 degree
angle and directly above the flap on her thigh pouch. This took a bit of
design work because of the wide shape of the gun and getting the angles
just right, but the stitching went quick. I made a wide cone shaped
holster with a thin strap and a small snap to hold the gun in place.
Then I made a belt loop at the correct angle, but added another of the
plastic snap clips to the actual belt loop so that the holster can be
removed easily without first taking off the thigh pack. This way she
could change in and out of costume, but still keep the thigh pack that
she was using for all her important stuff on her belt without
any hassle with the holster.That's about it. This all took several hours, but it was time spent putting the toddler to sleep and watching Stargate Atlantis late in the evening. Also, I have several left over pieces of the bag that I can use to make more accessories for costumes in the future.
KtCallista back for some final words on hair:

 |
| We didn't add the post Ewok villiage straps, but that can be a nice accent too. |
I hope you've enjoyed seeing how easily these costumes came together over the course of a little over a week. Costuming can be done accurately and easily as you can see. It's also loads of fun! Not to mention all the fun we will have for the rest of the year (possibly longer) using this stuff.
One other thing I forgot to add to the post about Endor Leia's belt. I was originally shopping online for Star Wars belts and I ordered the Padme Amadala belt and blaster set. This also had two pouches and a holster and even though it is cream colored, we thought we would be able to paint it black and it would work well enough. The blaster is all wrong, but V3 could play with it and we would use the blaster we had for V1 instead.
ReplyDeleteWhen it arrived it became apparent just how cheap the belt was. It doesn't have pouches, they are little rubber blobs glued to the belt that are supposed to look like canvas pouches from the movies. The belt itself was also rubber. It looked cheap, un-paintable, prone to falling apart, and very likely to irritate V1 as she has a mild latex allergy to latex band aids.
We shipped it back for free and got a full refund (go amazon.com). Live and learn.